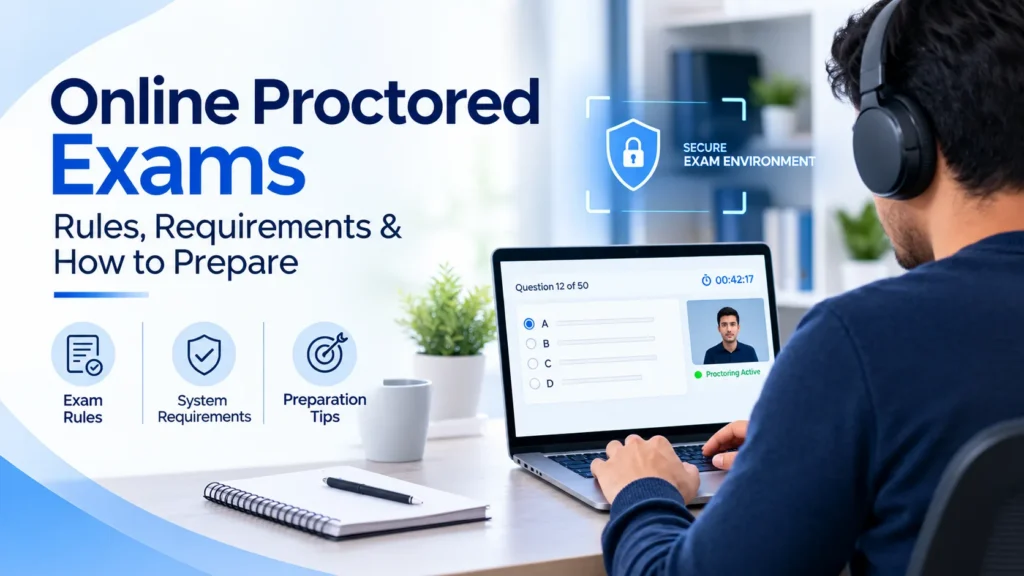
Online Proctored Exams: Rules, Requirements & How to Prepare
12 min.
14/11/2026
18/11/2026
Online exams allow you to take professional tests from home. You don’t always need to visit a test centre. However, you must follow certain rules before and during the test. These rules cover your identity, room, computer, internet connection, and behaviour during the exam.
An online proctored exam uses a human supervisor, monitoring software, or both to check your activity. The system may use your webcam, microphone, and screen recording to monitor the test. You may also need to show an identity document before you can begin.
These checks are important for an online certification exam, especially in fields such as cybersecurity. A failed system check or an ID mismatch can delay your test. In some cases, you may lose your exam slot.
The guide provides information on the requirements, technical requirements, room setup, and exam-day procedure. The guide will also compare two easy to obtain security credentials and give tips on preparation for a remote exam.
Online Proctored Exam Requirements, Rules and Preparation Guide
A test taken remotely entails more than just being knowledgeable about the subject matter. It is also important to satisfy certain security and technical requirements set by the testing agency. The following sections explain what you need to do before, during, and after your test.
Online proctored exams are exams taken by the student via a computer and the testing system, which controls his/her actions. Usually, the student takes such exams from home.
The testing procedure could be performed according to one of the four methods provided by the exam provider:
Live proctoring: Your actions are controlled by a human proctor, who contacts you through a web camera.
Automated proctoring: In this case, the video, audio, and screen activities are controlled by the special software.
Recorded proctored exams: The system records your actions during the test, and the proctor watches the recordings later.
Hybrid proctored exam: It is a combination of live and recorded testing.
During the test, there could be the cases when some actions will be flagged by the system. These actions can be connected with turning away your camera, having other people in the room, or using unauthorized software.
Though the flagged action does not mean that you have broken any rules, the recording will be watched by the exam provider to take any further decision. Serious violation can cause stopping or cancelling the test.
2. Identity Verification: What Documents Are Required?
ID verification helps in confirming that the registered candidate is the person taking the exam. In most cases, a photo ID issued by the Government is required. This requirement will depend on the test and the country.
Examples of ID’s include:
Passport
Driver’s license
Government issued photo identity card
Other acceptable national identity cards
Sometimes, an Aadhar card or PAN card will be accepted in India. However, you must check your test provider’s ID requirements before booking your online exam.
Do the following before check-in:
Ensure that your ID is still valid.
Ensure that your name on the ID is the same as your exam name.
Ensure that the spelling of your first and last names is correct.
Have the original of your ID at hand.
Ensure that the photograph and text are clear.
Follow the process of capturing or uploading your ID.
Some test providers will require a live picture. They can match this picture against the picture on your ID. A name mismatch can stop you from starting the test. Contact the exam provider before test day if you need to correct your registration details.
3. Room Requirements and Webcam Positioning
The room has to comply with the examination security policy determined by the examination body. Select an empty room with a door which can be locked. Your desk has to be free from any books and papers.
Some examination bodies require you to do a 360-degree scan of your room. For this, you may need to shift your webcam or laptop closer to your desk in order to demonstrate the surroundings.
Check the following before the test:
Privacy of the room: Ensure that no one can come into the room while taking the test.
Desk: Clear your desk from all the unauthorised books and papers.
Background: Leave your back area free.
Lighting: Position a lamp in front of you to light up your face.
Webcam: Keep your face and upper part of the body in the view of the webcam.
Extra monitors: Disconnect all additional screens unless allowed by the examination body.
For a remote exam, avoid using a shared room. Inform your family about the test time so they can avoid entering the room.
Do not keep personal notes, smart devices, or other restricted items within reach. The rules may differ across exams, so follow the instructions in your candidate handbook.
4. Equipment and Technical Requirements
You may have a computer that works great for daily work but is not compatible with secure testing software. Please make sure that you satisfy all technical requirements before booking your exam.
Computer or laptop
The majority of vendors will need a supported desktop or laptop computer.
Check the following:
Your operating system complies with the minimum requirements.
Your device has enough available storage.
Your computer has the necessary system updates.
Your laptop is connected to the power supply.
There are no restrictions on your device that would prevent the testing software from running.
Not all tests are compatible with tablets or mobile devices. Make sure you check your device policy prior to installation.
Webcam and microphone
Your webcam should provide a clear image of your face. Your microphone should capture your voice without significant noise.
Prior to the test:
Test your webcam.
Check your microphone input.
Wipe the lens of the camera clean.
Make sure the camera is not obstructed.
Allow the testing software to access your camera and microphone.
Internet Connection
Stable internet connection reduces risk of disruptions. Sudden disconnecting from the network can freeze or terminate your test.
Do the following:
Connect using the Ethernet cable where possible.
Sit closer to the router when using the wireless internet.
Avoid heavy downloads while taking the test.
Ask other users at your place to minimize the use of the internet.
Have mobile hotspot as an alternative, but change the network only if allowed by the test provider.
Exam software setup
Some test providers require installation of a secure browser or testing application. It can limit access to websites, applications, screen sharing features, and keyboard shortcuts. Install necessary software before the test day. Conduct system compatibility check and close all unnecessary programs.
Also, review the requirements concerning use of VPNs, antivirus software, and other processes. Do not turn off security applications unless instructed by the provider. System check success does not guarantee that nothing else might go wrong. Repeat the system check closer to your exam date.
5. The Rules You Should Obey While Taking the Exam
The rules of taking an online proctored exam can be rather strict. The candidates should obey the candidate agreement at all times during the examination process.
Typical restrictions include:
Using mobile phone is not allowed.
No wearing of headphones except when permitted.
No opening of any other tabs or applications while taking the exam.
No consulting the textbooks and notes, no using websites for help.
Don’t make screenshots or photos of the exam questions.
Communication with another person is forbidden.
No leaving the frame of the video shot without approval.
Do not read the questions aloud if not permitted.
The software will make screen recordings, video, and audio records. The human supervisor might ask you to do the identification check once again. While taking an exam under the supervision of the system, follow all its instructions. No changing of the setting and leaving the seat are permitted.
It is important to remember the difference between the technical problem and violation of the rules. The internet connection problem might require help of the technical team. Any unauthorized assistance may result in cancellation of the exam.
6. Beginner-Friendly Security Credentials to Consider
There are many beginner-friendly cybersecurity credentials. Some of them provide security-related foundational knowledge, while others provide technical expertise like network or endpoint security. The two credentials that can be considered for comparison are Certified in Cybersecurity (CC) and CCST Cybersecurity.
A. Certified in Cybersecurity (CC)
Certified in Cybersecurity (CC) is a beginner-friendly cybersecurity credential for individuals who are just starting their careers in cybersecurity. There is no requirement of work experience before earning this certification.
The core domains for this credential include:
Security fundamentals
Security governance
Identity and access management
Network and cloud security concepts
Security operations
Incident response
This credential can help you understand how organisations protect their systems and data. It is a good starting point if you want to learn basic security rules and practices.
B. CCST Cybersecurity
Another entry-level credential is the CCST Cybersecurity. It deals with basic IT security and basic technical skills.
Major topics are:
Network security
Endpoint security
Threat management
Vulnerability assessment
Risk management
Security monitoring
Incident response
There are no official work experience requirements. But basic computer literacy, networking, and OS knowledge will prepare you for the exam.
Which Certification Is Right for You?
Your choice should be based on your level of expertise and your professional ambitions.
Take the Certified in Cybersecurity (CC) if:
You are new to cybersecurity.
Would like to study basic cybersecurity principles.
Would like to understand access control and security policy.
Are interested in cybersecurity operations and incident response.
Take CCST Cybersecurity if:
You want to learn technical security basics.
You are interested in network and endpoint protection.
Wou want to study threats and vulnerabilities.
You prefer topics related to IT support and security monitoring.
Both credentials can help you build basic knowledge. However, a certificate alone does not guarantee a job. You should also practise in a lab, learn networking basics, and work with common operating systems.
Sample Practice Questions
Try these sample questions before moving to the full interactive quiz below. Each question includes the correct answer and explanation, similar to what you will experience in a complete AZ-104.
1. You are tasked with managing access to Azure resources for a team that includes contractors. Your organization uses Microsoft Entra ID for identity management. You need to grant the contractors temporary access to a specific resource group for three months, after which their access should automatically expire without manual intervention. Which Azure feature should you use to implement this requirement?
Permanent role assignment with a scheduled deletion reminder
✓ Azure role-based access control (RBAC) with a time-limited assignment using privileged identity management (PIM)
Azure resource locks combined with access reviews
Management groups with conditional access policies
Correct Answer: Azure role-based access control (RBAC) with a time-limited assignment using privileged identity management (PIM) Privileged Identity Management (PIM) allows you to create time-bound role assignments that automatically expire after a specified duration. You can assign contractors a specific Azure RBAC role (such as Contributor) on a resource group with an expiration date of three months, and the access will be revoked automatically without requiring manual intervention. Why the other options are incorrect: l Permanent role assignment with a scheduled deletion reminder: This requires manual action to remove the assignment and relies on someone remembering to do so. It does not provide automatic expiration. l Azure resource locks combined with access reviews: Resource locks prevent accidental deletion or modification but do not control access permissions. Access reviews help audit access but do not automatically expire role assignments. l Management groups with conditional access policies: Management groups are for organizing subscriptions hierarchically, and conditional access is primarily for authentication conditions (device state, location, etc.), not for automatic permission expiration.
2. Your organization is deploying a set of virtual machines in Azure using a standardized template. You have several different configurations needed for development, staging, and production environments, each with different VM sizes, storage types, and network security group rules. Rather than creating separate templates for each environment, you want to use a single parameterized template that can be deployed multiple times with different values. What approach should you use to deploy these VMs efficiently?
Create separate ARM templates for each environment and deploy them manually through the Azure portal
✓ Use a single Bicep file with parameters that define environment-specific values and deploy it with a parameters file for each environment
Create one large Azure Resource Manager (ARM) JSON template and manually edit the JSON before each deployment
Use Azure DevOps pipelines to deploy VMs without any template infrastructure
Correct Answer: Use a single Bicep file with parameters that define environment-specific values and deploy it with a parameters file for each environment Bicep is the modern Azure Infrastructure as Code (IaC) language that is more readable and maintainable than ARM JSON templates. By creating a single Bicep template with parameters (such as vmSize, environment, storageType, and nsgRules), you can deploy the same template to multiple environments by providing different parameters files. This approach is efficient, repeatable, version-controllable, and reduces template duplication and the risk of configuration drift. Why the other options are incorrect: l Separate templates for each environment: This creates duplication and maintenance overhead. When you need to update the template logic, you must do so in multiple places, increasing the risk of inconsistencies. l Manually editing JSON before each deployment: This is error-prone, time-consuming, and does not follow Infrastructure as Code best practices. It also makes it difficult to track what changed between deployments. l Using Azure DevOps pipelines without templates: While DevOps pipelines are useful for automation, they do not replace the need for Infrastructure as Code templates. Pipelines should orchestrate the deployment of well-defined templates.
7. How to Prepare for the Examination: Checklist
A few days before your examination begin your preparation. Never wait till the last hour to install your testing software or arrange your room. The following is the checklist for preparation of your online certification examination.
3 to 5 days prior
Study the candidate manual.
Verify your examination date, time, and time zone.
Verify the identity documents that are allowed.
Check the system and computer requirements.
Download and install the testing software.
Perform the system compatibility test.
Test your internet connection.
Day prior to the examination
Ensure that you have charged your laptop and that the charger is connected.
Test your webcam and microphone.
Clear up your desk.
Arrange your chair and camera.
Make sure your room is free of all unauthorized material.
Prepare your original photo ID.
Close unnecessary applications.
Sleep well.
On exam day
Sit at your desk at least 30 minutes before the test, or earlier if instructed.
Restart your computer.
Check your internet connection.
Close all background applications.
Complete the identity verification process.
Follow the room scan instructions.
Listen to the proctor.
Start the test only after receiving permission.
During the online proctored exam, focus on the questions and manage your time. Read each question before choosing an answer. Do not panic if the supervisor asks you to repeat a room scan or verify your ID. Follow the instructions and ask for help if anything is unclear.
8. What If You Are Confronted With a Technical Issue?
Even after a successful system check, there might be technical issues in the form of an internet disconnection, webcam malfunction, or a frozen secure browser.
Here is what to do when something goes wrong:
Do not panic. Avoid continually rebooting the computer.
Notify the invigilator via the designated communication link.
Take troubleshooting steps.
Do not change devices and/or network unless permitted.
Observe the exact time and nature of the problem.
Reach out to the official examination support if the test ends due to the issue.
It will depend on the policy of the exam provider. Some exams give you a chance to log back in during a specified period, while others need you to schedule a fresh test date.
Prior to scheduling for a remote test, you should know the cancellation, rescheduling, and retake policy. It comes in handy if you have an unreliable internet connection or technical limitations of your computer.
9. Common Mistakes to Avoid
While many candidates are able to understand the topics of the exams, they often overlook the technical and administrative requirements.
Don’t make these common mistakes:
Using the incorrect identification: Your identification document might not comply with the provider’s requirements.
Omitting the system check: Your computer might be incompatible with the test.
Having your phone nearby: Your phone, even if it is turned off, might violate the guidelines.
Using a shared location: Others might disturb you during the test.
Not updating your software: An outdated software might produce errors.
Being late: You can miss the time of checking-in.
Using an office computer: The security policy of your company might block your exam application.
Effective exam proctoring requires adherence to the rules and proper testing environment. Study the guidelines of your specific test. Don’t think that all providers have similar procedures.
Conclusion
An online-proctored exam calls for preparation in addition to knowing the subjects. Your ID, room, computer, internet connection, and testing software should all adhere to the requirements of the provider.
Start early. Familiarize yourself with the candidate handbook and conduct the system check. Prepare your room and have your ID handy. These tips will ensure that you are well-prepared for your test date. When you are ready to take another certification, start with Certification Exam.
FAQs
1. Can I take an online certification examination from my house?
Yes. There are many online exam providers which provide exams from their houses. All you need is a private space, a compatible computer, a working camera and microphone, and reliable internet connectivity.
2. What if my internet connectivity gets disrupted while I’m taking a test?
The test may get suspended or terminated. It depends on the policies of the provider. Notify the proctor of yours and try to recover accordingly.
3. Can I use my phone during an online proctored exam?
Usually, no. Mobile phones and other personal devices are generally not allowed during the test. Some providers may ask you to use your phone during check-in to capture your ID or photograph. Follow the instructions and put it away once check-in is complete.
4. Why is exam proctoring required for certification tests?
It helps confirm your identity and protect the fairness of the test. Monitoring tools may record video, audio, and screen activity. These checks also help identify unauthorised assistance and possible rule violations.
Here are the most popular certification exams... Try them now!